Landscaping advice aimed at beginners usually fails in one of two directions. It is either a makeover fantasy, tear everything out and start over, that collapses on contact with a real budget and a real weekend, or a pile of plant suggestions with no method at all. Here is the method this guide teaches instead, and it fits on one line: read your yard, prepare one bed properly, plant it in three layers, mulch it, and stop. One finished bed changes how a whole yard looks and teaches you everything the second bed needs. Five started beds teach you only regret.
This approach works because landscaping is mostly not about plants. It is about water, sun, and soil, read honestly, and about edges and layers, which are what the eye actually sees when it calls a yard beautiful. Plants are the last step, not the first. Work through the First Bed Landscaping Checklist on this page as you go: it holds the reading, the preparation, and the planting in the order that makes one bed succeed.
Interactive tool
First Bed Landscaping Checklist
Check off each step as you finish it. Your progress stays on this page.
0 of 6 complete
0% done
Step 1: Read the Yard Before You Touch It
Spend one week just looking, at different times of day, before you buy a single plant. You are mapping three things.
Sun. Watch where the sun falls in the morning, at midday, and in the afternoon, and note which areas are sunny all day, which get half a day, and which live in shade. This map decides what can grow where more absolutely than any other factor, and it changes with the seasons as trees leaf out, so note the trees as part of the map. Most flowering shrubs and perennials want the sunny ground; shade ground has its own excellent plants, but they are different plants, and no amount of wishing moves a plant from one list to the other.
Water. Watch the yard during and after rain. Where does water stand, and for how long? Where does it run, and where does the ground stay dry under eaves and trees even in a storm? Low spots that hold water suit moisture loving plants and drown the rest; the dry strip under a roofline defeats all but the toughest drought tolerant choices. Drainage is destiny for roots, and your rain map is the only honest source for it.
Zone and soil. Your hardiness zone, which describes your winter cold, decides which perennial plants, shrubs, and trees survive your winters; it is printed on every plant label for exactly this purpose. Your soil, its texture and its history, decides how you prepare the bed, which is Step 3. A handful squeezed tells you the basics: gritty is sandy, slick and moldable is clay, dark and crumbly is the loam everyone hopes for.
Step 2: Call Before You Dig
Before any digging deeper than a trowel's length, know what is buried. In the United States, calling 811 a few days before you dig gets your underground utility lines marked for free, and the rule exists because a spade through a cable or a gas line is a catastrophe out of all proportion to a flower bed. Make the call a habit attached to every project, not a judgment you remake each time. While you wait for the marks, you can be doing everything else in this guide: the reading, the planning, the shopping. The call costs a few days of patience and removes the one risk in landscaping that is not recoverable.
Step 3: Choose One Bed and Prepare Its Soil
Choose the bed that will teach you the most and show the most: usually the one by the front door or along the most used path, where you will see it daily and where its success will be enjoyed rather than theoretical. Define its edge cleanly, a smooth curve or a straight line cut with a spade, because a crisp edge is half of what makes a bed look landscaped rather than accidental. Edges can be maintained by re cutting, or held with stone, brick, or metal edging later; the shape matters more than the material.
Then prepare the soil the way the vegetable garden taught you: clear what is there, loosen the ground, and work in compost generously across the whole bed before any plant goes in. Landscaping beds are planted once and expected to perform for years, which makes this preparation the highest leverage hour in the project. Plants set into unprepared ground spend their first years struggling in whatever the builder left behind, and no fertilizer schedule rescues them. Prepare the whole bed, not individual planting holes, because roots grow far beyond their holes by the second year and the bed is the real container.
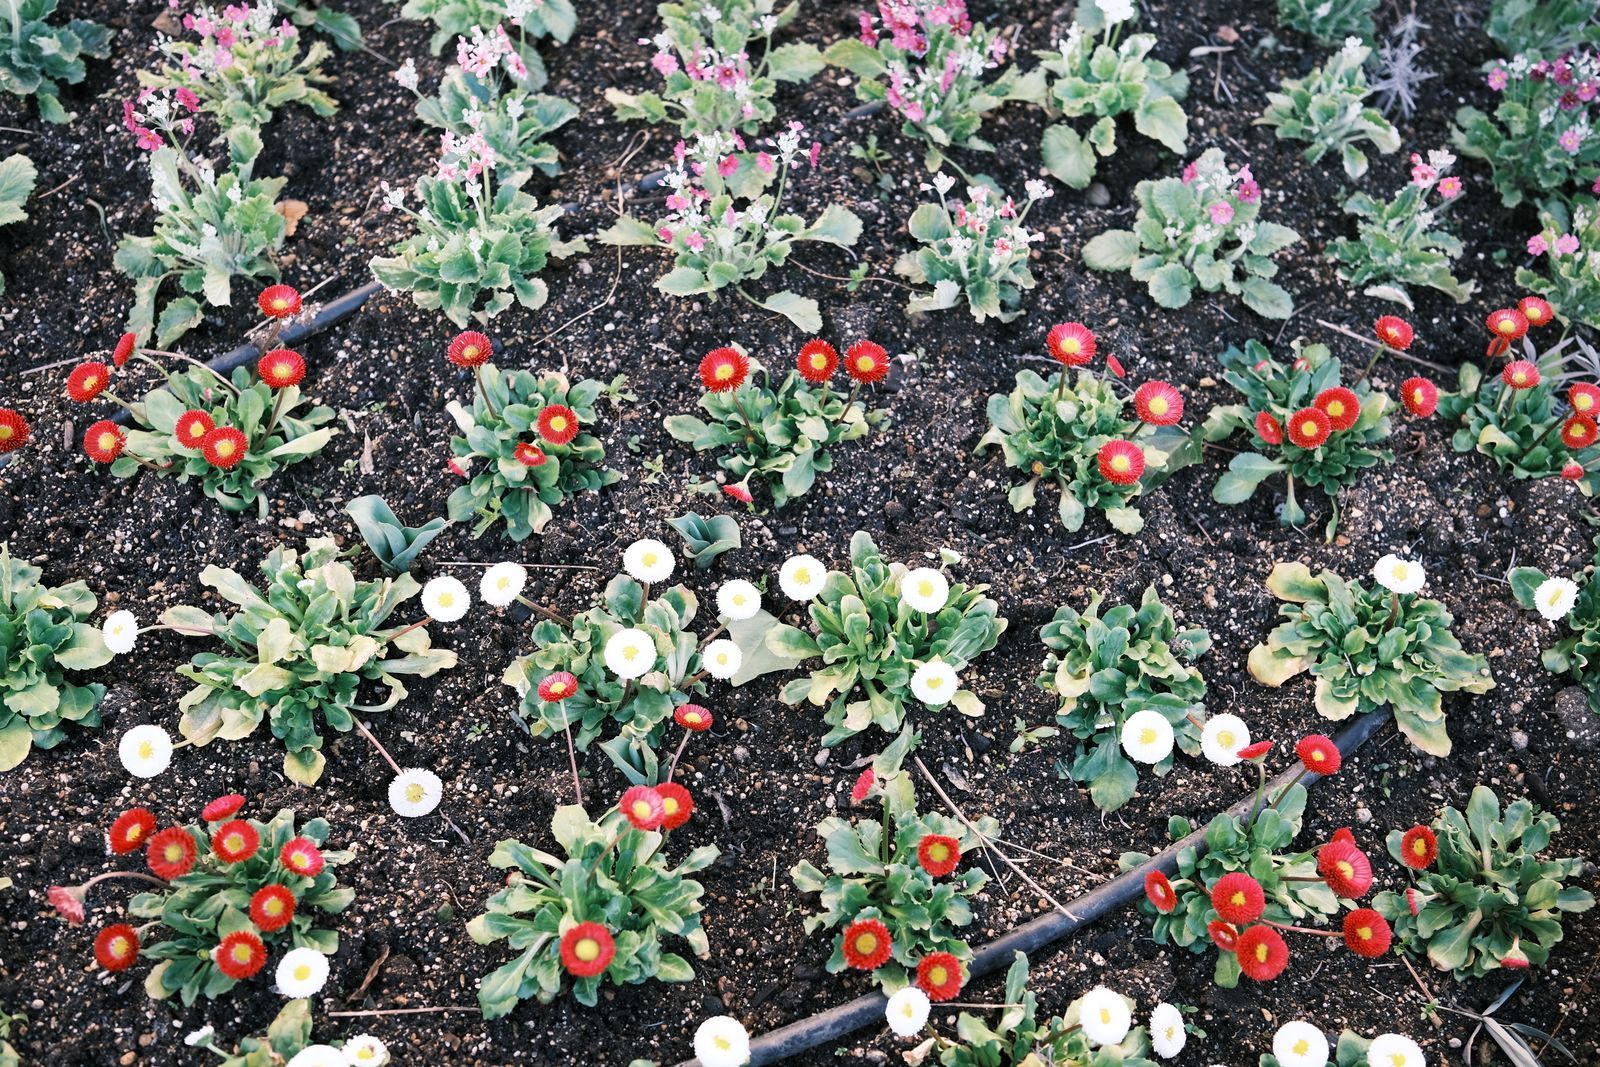
A flower bed with red and white blooms in spring, one bed planted in layers against a house
Step 4: Plant in Three Layers
Here is the planting recipe that makes a bed look designed rather than collected. Think in three layers, back to front, tall to short.
The back layer is structure: the tallest plants, shrubs or tall perennials, set against the fence or wall. These give the bed its year round bones and its backdrop. Choose them by the zone and the sun map first and by their flowers second, because you will look at their foliage for twelve months and their flowers for three weeks.
The middle layer is the body: medium perennials and smaller shrubs that carry the bed's main flower show and fill its volume. Plant these in groups of the same plant together, three or five of a kind, rather than one of everything. Groups read as design from across the yard; singletons read as a collection of samples. This single habit, grouping, is the most visible difference between a beginner's bed and a designed one, and it costs nothing.
The front layer is the edge: low plants that soften the border, spill slightly toward the lawn or path, and hide the legs of everything behind them. Keep them low enough to never need rescuing from the plants they front.
Space every layer by the mature size on the plant's label, not by the size in the pot. A new bed planted at mature spacing looks sparse for its first season and correct forever after; a bed planted full on day one becomes a wrestling match by year three, with you as the referee holding pruners. Fill the temporary gaps with mulch and patience, or with annual flowers you replant yearly, which is the professional's trick for a bed that looks finished while it grows up.
Step 5: Water It In and Mulch It
Water every plant thoroughly as it goes in, and water the whole bed deeply after planting to settle soil around every root. New plantings then need a season of watering attention while their roots establish, deeper and less frequent as the months pass, teaching the roots downward. A plant is established when it has grown through a full season in your ground; until then, it is still partly living in its nursery pot's worth of roots, and drought checks it hard.
Finish the bed with mulch over every inch of bare soil, kept a small distance from stems and trunks. Mulch is the bed's clothing: it holds moisture, suppresses the weeds that would colonize your careful preparation, moderates soil temperature, and gives the whole bed a unified, finished surface that makes the plants look chosen. It breaks down slowly and is topped up as it thins, which is also your annual chance to feed the bed's soil a little more organic matter. A mulched bed needs a fraction of the weeding of a bare one, which is why professionals mulch everything and beginners, who skip it, weed forever.
Step 6: Live With It for a Season Before Bed Two
The discipline that makes landscapers is restraint after planting. Live with your one bed for a full season. Watch what thrives, what sulks, where the sun map lied, and where the rain map told the truth. Take notes and photographs; the bed will teach you your yard's real conditions better than any book, including this one. Some plants will fail, and a failure in a prepared bed is information, not incompetence: it marks a spot whose conditions you misread, and its replacement, chosen with the new knowledge, will usually thrive.
Then, and only then, plan the second bed, with a season of local evidence in hand. This is how real landscapes get built: not in a heroic spring of total transformation, but bed by bed, each one finished, each one teaching the next. In five years of this rhythm a yard becomes the thing the makeover shows promise in a weekend, except that yours will be alive, adapted, and paid for.
Working With What You Have
Almost no beginner starts from bare earth, and the existing yard is not the enemy of the plan; it is the plan's raw material. Mature trees and shrubs that suit their spots are worth more than anything you can buy, because a nursery sells you a plant's future and a mature shrub is that future already arrived. Evaluate what exists with the same three tests as everything else: does it fit the sun and water where it stands, is it healthy, and does it earn its space? Keep what passes, however unfashionable, and let your one bed at a time method gradually surround the keepers with company that flatters them.
Removal is also a skill. A shrub in the wrong place, starving the bed around it and blocking the window it was never meant to reach, is not heritage; it is a mistake someone else planted. Remove failures cleanly and completely, roots and all where the plant resprouts, and record what the spot taught you about its conditions before its replacement is chosen. The yard you inherit is a draft, not a verdict, and editing it is the landscaper's normal work.
The Mistakes This Method Exists to Prevent
They are worth naming plainly, because every beginner meets them in the wild, usually in their own first yard. Planting before reading: the beautiful shrub bought on impulse and installed in shade and wet feet, dead by August for reasons that were knowable in April. Preparing holes instead of beds: a plant in a rich pocket surrounded by hostile ground, whose roots refuse to leave the pocket and circle like a pot's. Planting at pot size: a bed that looks finished in May and needs demolition by the third year. Skipping mulch: a bed that becomes a weeding sentence served weekly. And the master mistake, starting everywhere at once, which converts a garden into a guilt landscape of five unfinished projects. One bed, read, prepared, layered, and mulched, prevents all five, which is why this guide is short on plant lists and long on sequence. The plants are the reward. The sequence is the landscaping.
Frequently Asked Questions
Where should a beginner start with landscaping?
With one bed, read and prepared properly: map the sun and water in that spot, choose plants that fit your zone and those conditions, prepare the whole bed's soil with compost, plant in three layers at mature spacing, and mulch. The bed by the front door or the most used path is the best first choice, because you will see it daily and learn from it fastest. Finish it completely before starting a second.
How do I know what plants suit my yard?
Match each plant to three facts you gather first: your hardiness zone, which decides winter survival for perennials and shrubs; the sun the spot actually gets across a day; and the drainage you observe after rain. Plant labels state zone and sun needs plainly. A plant matched to all three thrives with ordinary care; a plant matched to none fails no matter how well it is watered. When in doubt, ask your local extension office or a local nursery what performs in your exact conditions.
Should I plant one of each plant I like, or groups?
Groups. Planting three or five of the same plant together reads as intentional design from any distance, gives pollinators a worthwhile target, and simplifies care, because a group shares one set of needs. A bed of singletons reads as a collection of samples, however lovely each plant is. If your budget only stretches to one plant today, buy one plant of a kind you can add to later, and let the group build over seasons.
Do I really need to call before digging a flower bed?
Yes. In the United States, calling 811 a few days before you dig gets underground utilities marked for free, and beds are dug exactly where lines run: along streets, fences, and house walls. The call is free, the wait is short, and the alternative risk is wildly out of proportion to the project. Make it a standing habit for every digging project, and do your planning and shopping while the marks are made.
How far apart should I plant shrubs and perennials?
At the mature size printed on the label, measured center to center. A shrub labeled as growing 4 feet wide gets 4 feet from its neighbor, however small it looks in the pot. New beds planted this way look sparse for a season, which mulch and a few annuals disguise, and then they look right for decades. Beds planted to look full on day one need aggressive pruning or removals within a few years.
How much maintenance does a landscaped bed need?
Less than a lawn habit would suggest, if it was built this way: prepared soil, matched plants, grouped plantings, and full mulch. Expect a spring cleanup and mulch top up, watering attention for new plants in their first season, deadheading and tidying through summer as you enjoy it, and a fall review. The heavy work is all at the front, in the preparation, which is exactly why this guide spends so much of its length there.
Photo credits: Huu Huynh (Pexels); RDNE Stock project (Pexels). Photos are served from this site; follow the credit to the library page for the original.